- Site Navigation -
NEWS LIST
How to Quality-Check Steel Supports Before Installation?
Author:yicheng Date:2025-09-03 18:09:18 Hits:52
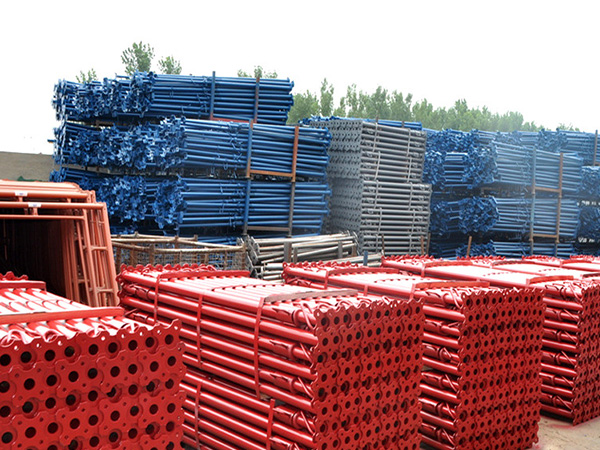
Quality checking steel supports before installation is a critical step to ensure structural safety,durability,and compliance with design standards.The process covers material verification,dimensional accuracy,surface condition,mechanical performance,and documentation review,with clear criteria to filter out defective components.Below is a systematic,step-by-step guide to the quality check:
1.Review Documentation:Verify Compliance with Standards First
Before inspecting the physical product,confirm that the steel supports meet design and industry requirements through paperwork.This“paper check”avoids wasting time on components that are fundamentally non-compliant.
Certificates of Conformance(CoC):Ensure the manufacturer provides a CoC stating the steel grade(e.g.,Q355B,ASTM A572 Grade 50),chemical composition(carbon,manganese,sulfur,phosphorus content),and production batch number.Cross-check the steel grade with the design drawings—using the wrong grade(e.g.,low-strength steel for high-load supports)is a critical defect.
Test Reports:Demand mill test reports(MTRs)for mechanical properties(yield strength,tensile strength,elongation)and non-destructive testing(NDT)results(e.g.,ultrasonic testing for internal flaws).For high-stress supports(e.g.,bridge piers,high-rise core columns),confirm additional tests like impact resistance(Charpy V-notch test)if required by the design.
Design Drawings&Labels:Check that each support is labeled with the project ID,part number,and load rating(if applicable).Compare the label information with the design drawings to ensure no mix-ups(e.g.,confusing a 100mm-diameter column with a 80mm one).
2.Visual Inspection:Check Surface&Basic Integrity
Visual inspection is the first line of defense to identify obvious defects.Use the naked eye or a magnifying glass(10x)for detailed checks,focusing on:
Surface Defects:Reject supports with critical surface flaws,including:
Cracks(any visible linear cracks,especially at welds,edges,or bolt holes—these can propagate under load).
Corrosion/Rust:Light surface oxidation(faint rust)may be acceptable if removable via sandblasting,but pitting corrosion(deep,localized holes)or thick rust layers(indicating long-term exposure to moisture)are unacceptable.
Scratches/Dents:Scratches deeper than 10%of the steel thickness(e.g.,>3mm for a 30mm-thick plate)or dents that deform the support’s cross-section(e.g.,a bent I-beam flange)compromise structural integrity.
Weld Quality(for welded supports):For supports with welded joints(e.g.,truss members,bolted connections),check welds for:
Uniformity:No uneven bead height,gaps,or“cold laps”(partial fusion between weld and base metal).
Porosity:No visible bubbles or voids in the weld(indicates poor welding process).
Undercut:No grooves along the weld edge(undercut weakens the base metal and reduces load-bearing capacity).
3.Dimensional Accuracy:Ensure Fit with Installation Requirements
Steel supports must match the design dimensions exactly—even small deviations can cause misalignment during installation(e.g.,a 2mm offset in bolt holes may prevent proper fastening).Use precision tools to measure key parameters:
Tools:Vernier calipers(for small parts),tape measures(for length/height),straightedges(for flatness),and laser distance meters(for large supports like columns).
Key Dimensions to Check:
Cross-sectional size(e.g.,diameter of circular columns,flange width/thickness of I-beams,wall thickness of hollow supports—deviations must be within±1%of the design value,per standards like ISO 10474).
Length/Height:For vertical supports(e.g.,building columns),length deviation should be≤±5mm for every 3 meters(prevents uneven floor heights).
Bolt Hole Position&Size:Check hole diameter(deviation≤±0.5mm)and center-to-center distance between holes(deviation≤±1mm)—misaligned holes will require re-drilling,which weakens the support.
Flatness:For base plates(used to anchor supports to foundations),flatness tolerance is typically≤2mm per meter(ensures full contact with the foundation and even load distribution).
4.Mechanical Performance Spot-Check:Validate Strength
While MTRs confirm factory test results,on-site spot-checks are recommended for critical projects(e.g.,bridges,skyscrapers)to avoid“certificate fraud”or batch defects.
Sample Selection:Randomly select 1–3%of supports from each batch(or 5–10 pieces for small batches)for testing.
Common Tests:
Hardness Test:Use a Brinell or Rockwell hardness tester to confirm hardness values match the steel grade(e.g.,Q355B should have a Brinell hardness of 150–190 HB).Low hardness may indicate insufficient heat treatment;high hardness may mean brittleness.
Tensile Test(for small components):Cut a sample from the support and test its yield/tensile strength on a universal testing machine—results must be within the range specified by the steel standard(e.g.,ASTM A572 Grade 50 requires yield strength≥345 MPa).
Straightness Test:For long supports(e.g.,bridge girders),place the support on a flat surface and use a string or laser level to check for bending—deflection should be≤L/1000(L=length of the support;e.g.,a 6m girder can bend no more than 6mm).
5.Non-Destructive Testing(NDT):Detect Hidden Flaws
Visible and dimensional checks cannot identify internal defects(e.g.,voids,inclusions,or hidden cracks),so NDT is mandatory for high-load or safety-critical steel supports(e.g.,bridge piers,seismic-resistant columns):
Ultrasonic Testing(UT):Uses high-frequency sound waves to detect internal flaws(e.g.,a 2mm void inside a column).UT is ideal for thick steel sections(≥10mm)and welds.
Magnetic Particle Testing(MPT):Detects surface and near-surface cracks(≤5mm deep)in ferromagnetic steels.It is commonly used for bolted connections and welds—cracks appear as visible“traces”when magnetic particles are applied.
Liquid Penetrant Testing(LPT):Suitable for non-ferromagnetic steels(e.g.,austenitic stainless steel).It uses a colored dye to seep into surface cracks,making them visible under UV light—effective for detecting even micro-cracks(≥0.1mm wide).
6.Final Verification:Tagging&Segregation
After completing all checks:
Accept/Reject:Mark compliant supports with a“Pass”tag(including inspection date and inspector ID).Segregate defective supports(e.g.,cracked,undersized)in a dedicated“Reject”area—do not mix them with parts to avoid accidental installation.
Record-Keeping:Document all inspection results(photos,measurements,test reports)in a digital or physical file.This record is critical for future maintenance,audits,or liability claims(e.g.,if a support fails later,the inspection log can prove whether it was installed correctly).
By following this structured process,you can ensure that only high-quality,compliant steel supports enter the installation phase—ultimately protecting the structural safety and service life of the project.


